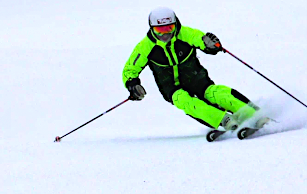
I often hear this from coaches or instructors about how skiers should acquire a certain position and look. Let's investigate and explore this common myth about skiing. The myth is:
Keep your hips level!
While the concept has some merit it's never achieved. The hips are never level. Have a look at the diagram below. The meaning has merit, however, the way it is implemented needs to be cleared up.
Follow as I explain what the colored lines indicate.
Thank You Alfonso Lázaro for the graphic!
The pink or magenta line is level.
The red line that intersects the pink line is the angle of the hips.
The yellow line indicates the upper body's attempt to stay verticle or Counterbalanced.
The black curved line is the articulation of the torso to remain in balance and also to keep the torso aligned to the forces so the skis can hold an edge and not go flat, or skid away.
When you analyze what movements are required to achieve this body configuration or alignment you need to understand the forces, the movements, and which "Essentials" are applied.
Nowhere in my literature from "Anyone Can Be an Expert Skier to the "Essentials of Skiing" book or in the "PMTS Instructor Manual" is there a reference to lifting, tilting, or pivoting the hips to keep them level as a focus in transition.
The premise is correct however the methods describing how to apply hip positions are questionable. It is clear from this diagram that the hips aren't level. If you look at World Cup skiers frame by frame you will see the same hip angles as in the diagram above.
 |
Anna Fenninger Veith
|
The yellow lines show the relationship between the upper and lower body that are functional in skiing.
Hip tilting rarely accomplishes this relationship. The reason is that there are far more effective ways and methods to focus on to achieve this relationship. There are far more important movements in transition that need to be initiated and applied. The proper hip relation will develop as a result of these other correct movements as long as relaxation and secondary movement if the hip is allowed.
Hip control is such a foreign and difficult movement to create and activate while skiing. The way it is best achieved is not through muscle contraction or forcing a movement. The way to achieve proper hip engagement is through relaxation. If too much active hip tiling is your approach other parts of the body's natural alignment will be compromised. In essence, trying to physically manage the hip angle with a conscious approach will block the natural alignment of the hip to the body and the forces. Also, if this becomes your focus more essential movements will not govern your turn.
Where should you focus your efforts?
It all starts with the release and transition. While retracting and tipping the feet and legs toward the new angles, relax the midbody and focus on keeping the shoulders and torso moving toward the new outside ski. This involves relaxing the lateral torso controlling muscles on the inside half of the torso and contracting the outside torso muscles (the "External Obliques" and Quadratus Lamborium". This action is called counterbalance; which keeps the torso vertical as in the diagram with the yellow line. Engaging counterbalance at the transition activates the quadratus lumorium and the external obliques.
With this skier in the red jacket, there is no relaxation with the hips or balance lined up from the CG to the forces from the outside ski. This type of skiing is limiting and causes a plateau in progress. The basic mistake here is that the skier is extending the outside leg and leaning the whole body. When a skier is taught outside leg dominance this is often the result.
From the beginning of my career, I've coached inside leg movements, unweighting, and foot tipping. The whole idea of foot, leg tipping, bending, and angles are developed from this. The one crucial component that few skiers use is how to engage and properly use the hips further up the kinetic chain. That missing component is relaxation and letting the hip counteract while the upper body counterbalances. Those two actions combine to create and optimize the hip range of movement and self-leveling. Forcing leveling and pushing on the outside ski reverses and prevents these actions from happening.
Two other counterproductive actions that prevent angle development are holding our breath and driving the outside hand and arm toward the tip of the ski.


